As designers and developers, we interface with a digital world that is often rigid, linear, and predictable. Yet, as humans, we are fundamentally drawn to the organic, the complex, and the chaotic patterns of the natural world. This innate attraction is the core of biophilic design. My work focuses on translating these principles into the digital space. We can, and should, build websites and digital experiences that feel as vital and restorative as a natural landscape. The key is not to simply paste a photograph of a forest onto a webpage, but to embed the processes of nature into the code itself.
This brings us to the concept of procedural generation. We are not just writing code; we are creating a digital simulation of natural forms. Why are we so compelled by computer generated landscapes in movies and video games? Because the best ones are not designed by hand, pixel by pixel. They are grown using algorithms that mimic the “organized chaos” found in natural forms like clouds, water, fire, coastlines, and mountains. The most famous and foundational of these algorithms is Perlin noise.
This article provides a comprehensive, technical walkthrough to create a mountain terrain animation with Perlin noise in Javascript. We will move from the core theory of the algorithm to a static 2D heightmap, and finally to a fully interactive 3D animated landscape. This is a powerful tool in the digital biophilic designer’s toolkit, allowing us to generate infinite, unique, and beautiful natural forms.
Table of Contents
Foundational Concepts: What is Perlin Noise?
Before we write a single line of code, we must understand our primary tool. A common query is, “What is Perlin noise?” It is a type of gradient noise algorithm, not to be confused with simple “value noise.”
If you were to use your programming language’s built-in Math.random() function to color every pixel on a screen, you would get what is called “white noise.” It looks like television static. Every pixel’s value is completely independent of its neighbors. This is the very definition of chaos, and it looks nothing like the natural forms we are trying to create.
Natural forms are not pure chaos. They have structure. A point on a mountainside is very likely to have a similar elevation to the point directly next to it. A point a mile away, however, might be completely different. This concept is called local correlation, and it is the secret to making believable natural forms.
This is the problem Ken Perlin (a key entity in this field) solved in the early 1980s while working on the movie Tron. He needed a way to create computer generated textures that looked more like organic, natural forms and less like rigid computer graphics. His solution, Perlin noise, is brilliant in its design.
Instead of just picking random values, Perlin noise works with gradients. Imagine laying a grid over your 2D canvas. At each intersection of the grid, the algorithm places a random vector, which is essentially just a little arrow pointing in a random direction. Think of it as a field of wind gusts.
To find the “value” (like elevation) at any specific pixel, the algorithm looks at the random arrows on the grid corners surrounding that pixel. It then calculates how those “wind gusts” would influence that specific spot and, most importantly, smoothly blends the influences together. This smooth blending, called interpolation, is what ensures that point (x, y) is related to point (x+1, y). It creates the smooth, rolling, continuous quality that is the hallmark of all natural forms.
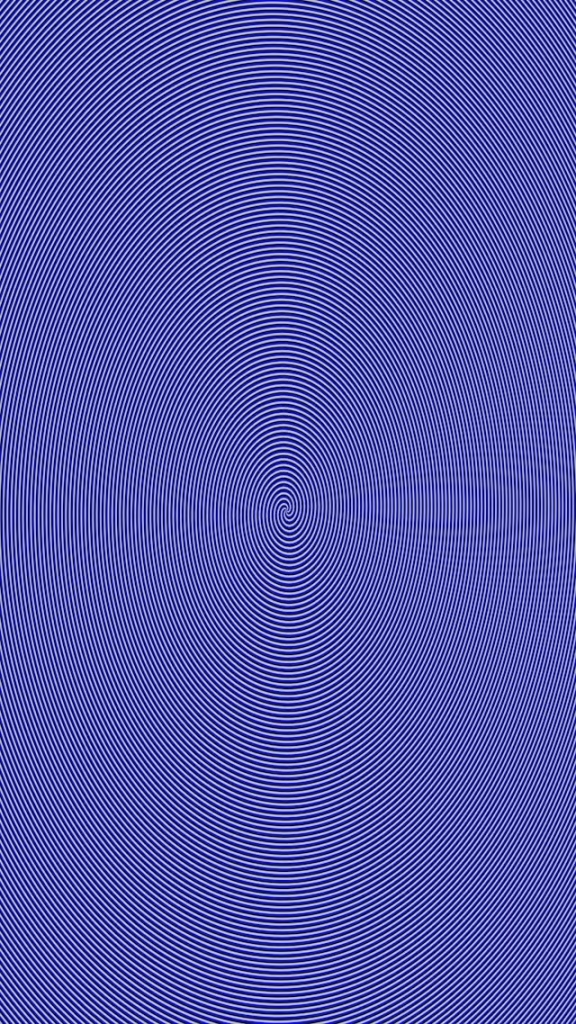
When you see a 2D image of Perlin noise, it does not look like static. It looks like clouds, or a blurry texture of light and dark patches. It has a coherent structure. This output is the raw material we will use to build our much more complex natural forms.
Setting Up the Javascript Environment
Our goal is to render these digital natural forms visually. To do this, we need a basic development environment. The tools are simple and accessible.
First, you need a basic HTML file. The only critical element this file needs is an HTML5 Canvas element. The <canvas> is our digital “plot of land.” It is a blank rectangle in the browser that we can draw on, pixel by pixel, using Javascript.
HTML
<!DOCTYPE html>
<html>
<head>
  <title>Natural Forms Generation</title>
  <style>
    body { margin: 0; overflow: hidden; }
    canvas { display: block; }
  </style>
</head>
<body>
  <canvas id="myCanvas"></canvas>
</body>
</html>
Second, you need a Javascript file. This is where all our logic will reside. You can link this in your HTML file with <script src="sketch.js"></script>.
While you can write the Perlin noise algorithm and all the canvas drawing code from scratch (a valuable exercise), it is more efficient to use libraries that specialize in this. For this guide, we will discuss two primary (and optional) libraries that are industry standards for creating natural forms:
- p5.js (Entity): This is a Javascript library focused on creative coding and making visual art accessible. It significantly simplifies the HTML5 Canvas. It provides simple functions like
createCanvas(),background(),stroke(), and, most importantly for us, a built-in, ready-to-usenoise()function. It is the perfect starting point for our 2D natural forms. - Three.js (Entity): When we are ready to move from a 2D map to a 3D mountain, we need more power. Three.js is the dominant library for creating 3D graphics in the browser. It uses WebGL (Web Graphics Library), an API that allows your Javascript code to talk directly to your computer’s graphics card (GPU). This is how modern video games render vast, detailed landscapes and natural forms in real time.
For the next two sections, we will use the concepts and function names from p5.js for simplicity, as they are clear and descriptive. Then, for the 3D section, we will graduate to the Three.js framework.
Part 1: Generating a Static 2D Mountain Heightmap
Our first task is to create a static, 2D image that represents a mountain landscape. This is called a “heightmap.” In a heightmap, the color of each pixel represents its elevation: black pixels are the lowest points (valleys or water), and white pixels are the highest points (mountain peaks).
We begin by setting up our p5.js setup() and draw() functions. The setup() function runs once at the beginning, and the draw() loop runs continuously, once per frame.
JavaScript
// In a p5.js sketch.js file

function setup() {
  createCanvas(800, 600);
  // We only need to draw once for a static image
  noLoop();
}

function draw() {
  background(0); // Start with a black background

  // Go through every single pixel
  for (let x = 0; x < width; x++) {
    for (let y = 0; y < height; y++) {
      // Get the noise value for this (x, y) coordinate
      let noiseValue = noise(x, y);

      // Map the noise value (0 to 1) to a grayscale color (0 to 255)
      let colorValue = map(noiseValue, 0, 1, 0, 255);

      stroke(colorValue); // Set the pixel's color
      point(x, y);       // Draw the pixel
    }
  }
}
If you run this code, you will get… a mess. It will be noisy, but likely very grainy and uniform. This is because we are sampling the noise “grid” too closely. We need to “zoom out.” We do this by scaling our coordinates:
JavaScript
let scale = 0.01;
let noiseValue = noise(x * scale, y * scale);
By multiplying our x and y by a small scale value, we are sampling points that are “closer together” on the noise grid, resulting in a much smoother, cloud-like image. This looks much more like a smooth, blurry terrain.
But we have a new problem. This terrain is too smooth. It looks like one single, massive, rounded hill. This is not how realistic natural forms look. A real mountain is not one big smooth curve. It is a large shape (the main mountain) that has smaller peaks on it, which are covered in large rocks, which are in turn covered in small pebbles and grit.
This concept is called Fractal Noise, and the algorithm to create it is often called Fractal Brownian Motion (fBm). It is the single most important technique for creating convincing natural forms.
The idea is to layer multiple “octaves” of Perlin noise on top of each other.
- Octave 1 (Low Frequency): Big, slow noise. This defines the main continents and mountain ranges.
noise(x * 0.01, y * 0.01) - Octave 2 (Medium Frequency): Smaller, faster noise. This adds medium-sized hills and features.
noise(x * 0.05, y * 0.05) - Octave 3 (High Frequency): Small, rapid noise. This adds the rocks, grit, and fine detail.
noise(x * 0.2, y * 0.2)
We add these layers together, but with a key difference: each new, more detailed layer has less influence (or “amplitude”) than the last. The big shapes should dominate, and the details should be subtle.
Here is a conceptual function for fBm:
JavaScript
function fractalNoise(x, y) {
  let total = 0;
  let frequency = 0.01; // How "zoomed in"
  let amplitude = 1.0;  // How much influence
  let maxAmplitude = 0;
  let numOctaves = 8;   // Number of layers

  for (let i = 0; i < numOctaves; i++) {
    total += noise(x * frequency, y * frequency) * amplitude;

    maxAmplitude += amplitude;

    // For the next layer:
    frequency *= 2; // Double the frequency (more detail)
    amplitude *= 0.5; // Halve the amplitude (less influence)
  }

  // Normalize the final value to be between 0 and 1
  return total / maxAmplitude;
}
Now, if we replace our single noise() call in the draw() loop with fractalNoise(x, y), the result is stunning. The canvas will fill with a complex, detailed, and realistic-looking heightmap. It will have large, flowing mountain ranges, smaller foothills, and fine, noisy details, just like a satellite photo. We have successfully generated our first 2D map of natural forms.
Part 2: Creating the Animation
Our next goal is to take our static 2D heightmap and make it move. We want to create a mountain terrain animation. The method for this is a clever and powerful trick.
Perlin noise functions are not limited to 2D. You can ask for noise(x) to get a 1D line, noise(x, y) for a 2D map, or noise(x, y, z) for a 3D “cloud” of noise values.
To animate our 2D map, we will sample from a 3D noise space. Think of the 3D noise space as a solid block of marble, full of complex 3D veins. Our 2D heightmap from Part 1 was a single, thin slice of that block.
To create an animation, all we have to do is take another slice of the block, right next to the first one. And then another, and another. By moving our “slice” through the 3D block of noise, we get a sequence of 2D images that are all related, creating a smooth animation.
How do we do this in code? We use the z argument in noise(x, y, z) as our time variable.
- First, remove
noLoop()fromsetup()so ourdraw()function runs 60 times per second. - Create a global variable,
let time = 0;. - Inside your
draw()loop, increment this variable very slowly. - Pass this
timevariable as the third argument to your noise function.
Here is the updated draw() function:
JavaScript
let time = 0;
let scale = 0.01;

function draw() {
  background(0);

  // We still loop through every pixel
  for (let x = 0; x < width; x++) {
    for (let y = 0; y < height; y++) {

      // The only change is here!
      // We are sampling a 2D plane (x, y) as it moves through a 3D space (z)
      let noiseValue = noise(x * scale, y * scale, time);

      // We can use our fractal function too
      // let noiseValue = fractalNoise3D(x, y, time);

      let colorValue = map(noiseValue, 0, 1, 0, 255);
      stroke(colorValue);
      point(x, y);
    }
  }

  time += 0.005; // Increment time slowly
}
(Note: You would also need to update your fractalNoise function to accept and pass the time variable to its noise() calls).
The result is magical. Your static heightmap now comes to life. It looks like you are flying over an infinitely generating landscape, or like clouds are rolling and bubbling across the screen. The natural forms are no longer static; they are dynamic. This technique of using a 3D noise function to animate 2D natural forms is fundamental. It can be used for rippling water, flickering fire, or blowing grass.
Part 3: Advanced Implementation (Moving to 3D)
We have created an animated 2D map of a terrain. Now, let’s create the 3D model of the terrain itself. For this, we leave p5.js behind and move to the power of Three.js. This will allow us to render true 3D natural forms.
Setting up a Three.js scene involves a few key components:
- Scene: The container that holds all our objects, lights, and cameras.
- Camera: The “eye” that looks at the scene. A
PerspectiveCamerais most common. - Renderer: The “artist” that draws what the camera sees onto our HTML
<canvas>. This uses WebGL. - Lights: Without light, our scene would be black. An
AmbientLight(for general fill) and aDirectionalLight(for shadows) work well.
Our “mountain” will start its life as a simple, flat plane. In Three.js, we create this with THREE.PlaneGeometry.
JavaScript
// Basic Three.js setup
const scene = new THREE.Scene();
const camera = new THREE.PerspectiveCamera(75, window.innerWidth / window.innerHeight, 0.1, 1000);
const renderer = new THREE.WebGLRenderer({ canvas: document.getElementById('myCanvas') });
renderer.setSize(window.innerWidth, window.innerHeight);

// Add light
const light = new THREE.DirectionalLight(0xffffff, 1);
light.position.set(0, 1, 1);
scene.add(light);

// *** This is the important part ***
// Create a plane with many segments
// We need a high number of segments to create detail
const geometry = new THREE.PlaneGeometry(100, 100, 100, 100);

const material = new THREE.MeshPhongMaterial({ color: 0x888888 }); // A simple gray material
const plane = new THREE.Mesh(geometry, material);

// Rotate it so we can see it "top down" like a landscape
plane.rotation.x = -Math.PI / 2;
scene.add(plane);

camera.position.z = 50;
camera.position.y = 50;
camera.lookAt(0, 0, 0);
If you run this, you will see a flat gray square. The magic happens when we displace this plane’s vertices using our Perlin noise function.
A PlaneGeometry with (100, 100) segments is not just 4 points. It is a grid of 101 x 101 vertices (over 10,000 points!). We can access and move every single one of these points.
We will write a function to loop through every vertex in the geometry and set its z position (which is “up” in our rotated scene) based on the noise value at its (x, y) location. We will need a Javascript port of a Perlin noise function, such as noise.js.
JavaScript
// (After creating the 'geometry' object)
// Make sure to have a noise.js library included, e.g., noise.seed(Math.random());

const positionAttribute = geometry.getAttribute('position');
const vertices = positionAttribute.array;
const scale = 0.1;
const amplitude = 10; // How high the mountains are

for (let i = 0; i < vertices.length; i += 3) {
  // vertices[i]   is the x coordinate
  // vertices[i+1] is the y coordinate
  // vertices[i+2] is the z coordinate (our "up")

  let x = vertices[i];
  let y = vertices[i+1];

  // Calculate height using fractal noise (fBm)
  // We need a 2D noise function, 'fractalNoise(x, y)' from Part IV
  let height = fractalNoise(x * scale, y * scale);

  // Set the vertex's Z position (height)
  vertices[i+2] = height * amplitude;
}

// Tell Three.js the geometry has been updated
positionAttribute.needsUpdate = true;
geometry.computeVertexNormals(); // Recalculate lighting
With this code, our flat plane is no longer flat. It is a bumpy, 3D mesh. You have just generated a 3D mountain range. These are tangible, 3D natural forms.
Now, for the final step: animation. We will use the exact same trick from Part V. We will use a 3D noise function and a time variable to make the mountain “roll.”
We create an animate() loop that uses requestAnimationFrame to run every frame. Inside this loop, we will re-calculate the height of every single vertex on every frame.
JavaScript
let time = 0;

function animate() {
  requestAnimationFrame(animate);

  time += 0.001; // Increment time
  const scale = 0.1;
  const amplitude = 10;

  // Loop through all vertices *again*
  const vertices = geometry.getAttribute('position').array;
  for (let i = 0; i < vertices.length; i += 3) {
    let x = vertices[i];
    let y = vertices[i+1];

    // Use 3D noise! (x, y, and time)
    // We need a 3D noise function, 'fractalNoise3D(x, y, z)'
    let height = fractalNoise3D(x * scale, y * scale, time);

    // Update the Z position
    vertices[i+2] = height * amplitude;
  }

  // Tell Three.js to update
  geometry.getAttribute('position').needsUpdate = true;
  geometry.computeVertexNormals();

  renderer.render(scene, camera);
}

animate(); // Start the loop
The result is a breathtaking, dynamic landscape of rolling hills or a stormy sea. To add a final biophilic refinement, we can color the vertices based on their height. This creates a “biome” map. Inside the loop, you can set the vertex color based on the height variable:
height < 0.2: Blue (Water)height < 0.4: Green (Plains)height < 0.8: Gray (Rock)height > 0.8: White (Snow)
This requires using VertexColors in the material, but the effect is the final step in creating rich, believable natural forms.
Key Considerations and Common Questions

This guide covers the core methodology, but there are important related topics.
What is the difference between Perlin noise and Simplex noise?
Simplex Noise (Entity) is the successor to Perlin noise, also developed by Ken Perlin. It is computationally faster and, critically, it does not have the “grid” artifacts that Perlin noise does. If you look closely at Perlin noise, you might see that its features tend to align slightly along 45 or 90 degree angles. Simplex noise solves this by using a simpler (simplex) grid, resulting in even more organic and high quality natural forms.
Is Perlin noise patented?
The original Perlin noise algorithm is not patent-encumbered and is free to use. Simplex noise, however, was patented by Ken Perlin (the patent has since expired in 2022). This patent led to the creation of OpenSimplex, a popular, open-source algorithm with similar benefits, designed specifically to be “patent-free.” Today, Simplex or OpenSimplex is often preferred for new projects, but both are excellent for generating natural forms.
Performance Optimization
In our 3D example, we are calculating noise for 10,000+ vertices every frame, all on the CPU. This is slow and inefficient. The professional solution is to offload this entire calculation to the GPU (Graphics Processing Unit).
This is done by writing a WebGL shader (using the GLSL language). A shader is a small program that runs directly on the GPU, which is built to perform thousands of small calculations (like a noise calculation for one vertex) all at the same time, in parallel. By moving the Perlin noise and vertex displacement logic into a vertex shader, you can have millions of vertices animating in real-time with no performance loss. This is the method used by all modern video games to render their vast, dynamic, and natural forms.
Conclusion: From Algorithm to Natural Analogue
We have completed a significant journey. We began with a purely mathematical concept: Ken Perlin’s algorithm for gradient noise. We used it in Javascript to transform a blank canvas into a static 2D heightmap, capturing the fractal detail of a landscape. We then advanced this to a dynamic 2D animation, giving our map the illusion of movement. Finally, we graduated to a full 3D implementation in Three.js, displacing a high-resolution mesh to create a tangible, 3D mountain range that “lives” and moves over time.
This exercise is far more than a simple coding tutorial. It is a fundamental practice of digital biophilia. We have used pure logic to replicate the complex, pseudo-random, and fractal processes that shape our own physical world.
The beauty of Perlin noise is that its structure inherently mirrors the structure of natural forms. The algorithm is a natural analogue. As you move forward, I encourage you to experiment. Change the scale. Add or subtract octaves. Adjust the amplitude. Try to model different natural forms: the veins in a leaf, the grain of wood, the turbulence of fire, or the formation of clouds. Each of these is a system of natural forms waiting to be generated from this powerful and elegant algorithm.